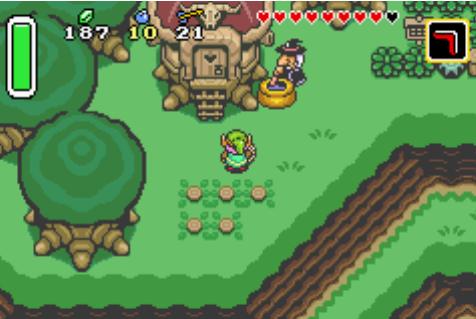
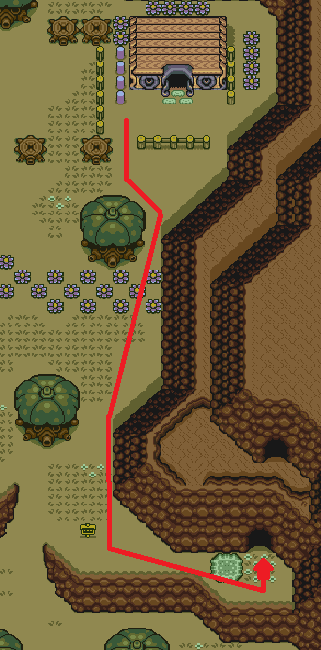
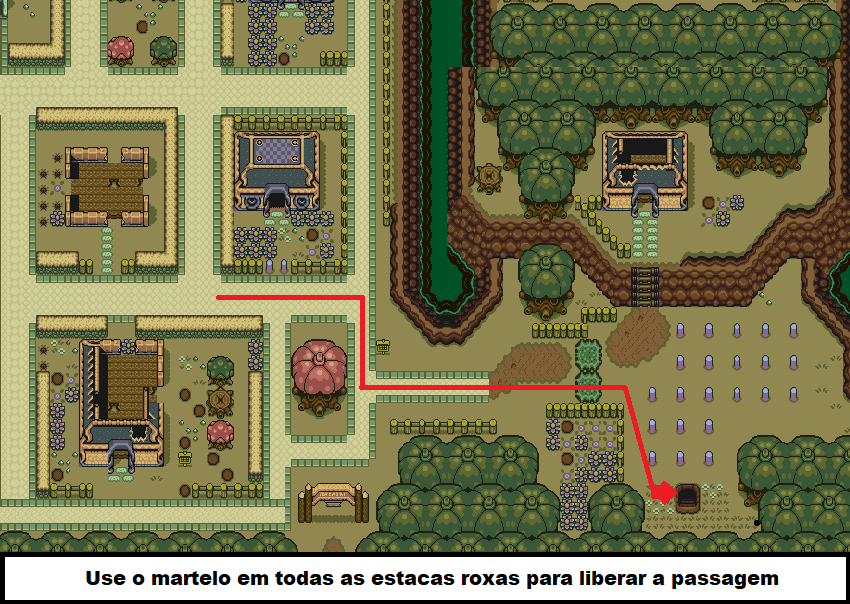
Hyrule Map: Detonando! The Legend of Zelda: A Link to the Past - Parte 13: Itens preciosos (opcional)
Por um escritor misterioso
Last updated 01 junho 2024
The Legend of Zelda - A Link to the Past (SNES): saiba como encontrar todos os Hearts Pieces - Nintendo Blast
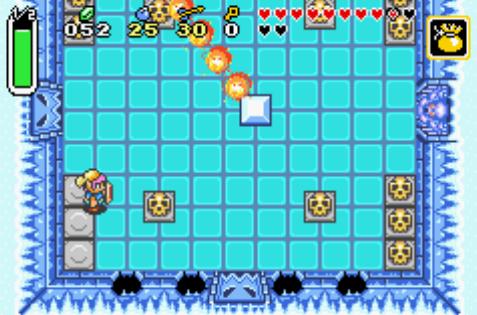
Hyrule Map: Detonando! The Legend of Zelda: A Link to the Past - Parte 18: O gélido Templo do Gelo
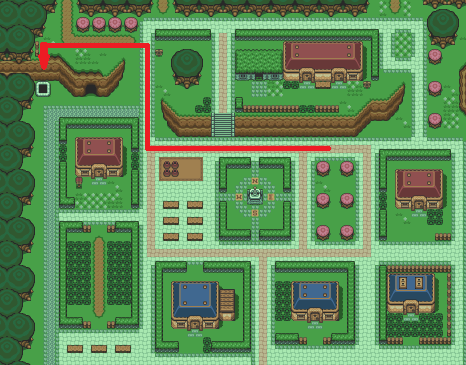
Hyrule Map: The Legend of Zelda: A Link to the Past

Detonado de Bolso – Legend of Zelda – A Link to the Past (SNES) – Parte 13 – Misery Mire

SNES – The Legend of Zelda: A Link to the Past – Database: Inventário
The Legend of Zelda - A Link to the Past (SNES): saiba como encontrar todos os Hearts Pieces - Nintendo Blast

Detonado de Bolso – Legend of Zelda – A Link to the Past (SNES) – Parte 11 – Gargoyle's Domain (Blind's Hideout)
A canvas print depicting the iconic map of Hyrule from the classic SNES game Legend of Zelda: A Link to the Past. • Available in 5 different sizes •
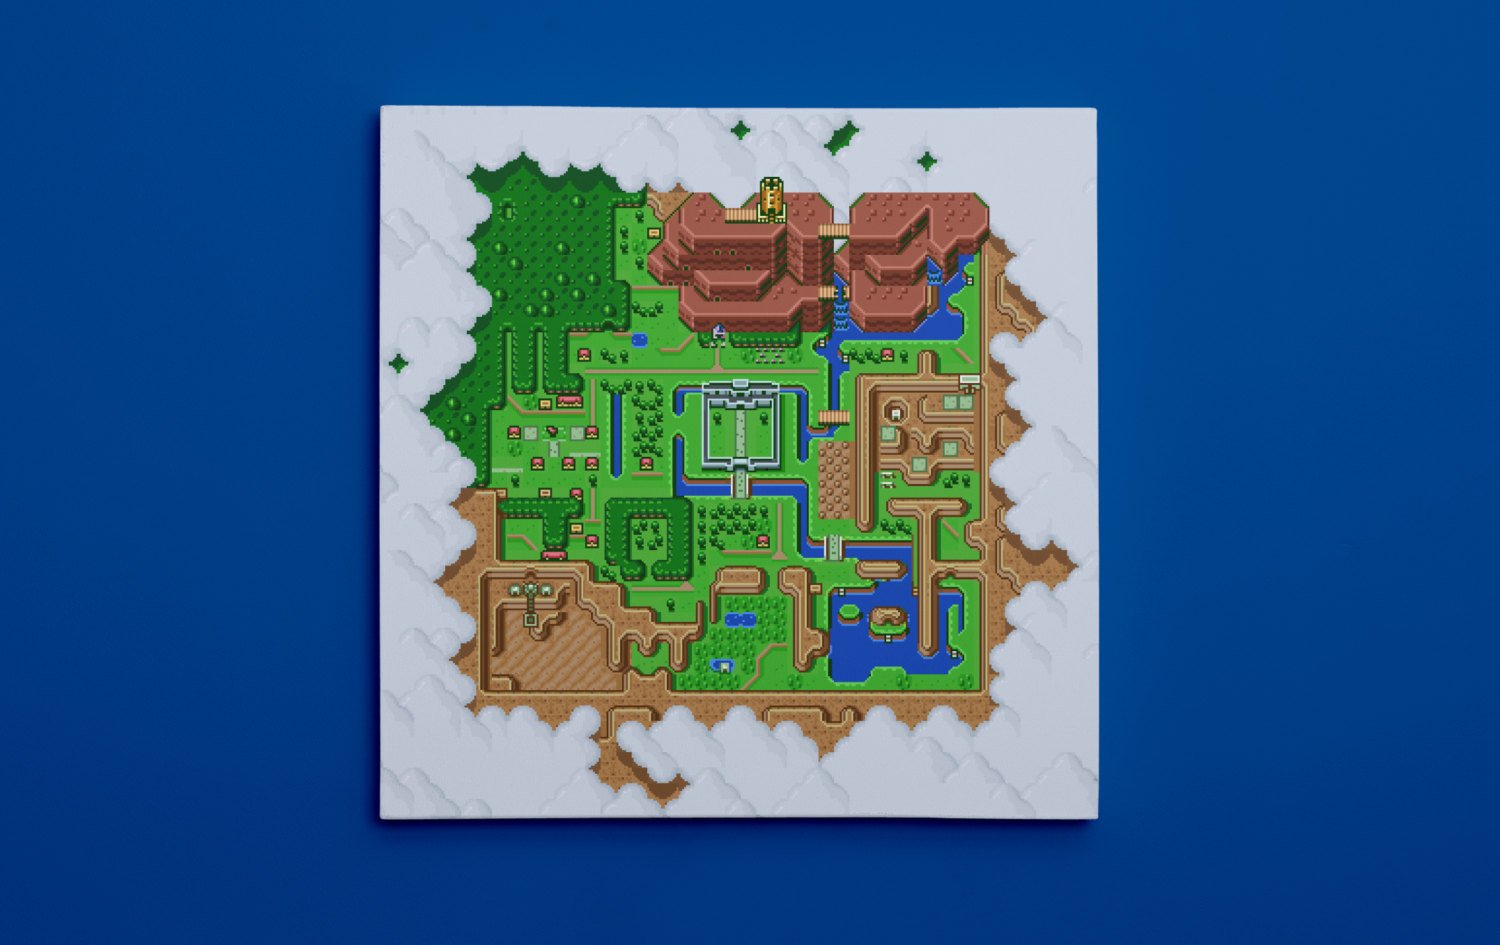
Legend of Zelda: A Link to the Past, Map of Hyrule - Canvas Wrap Print
A canvas print depicting the iconic map of Hyrule from the classic SNES game Legend of Zelda: A Link to the Past. • Available in 5 different sizes •
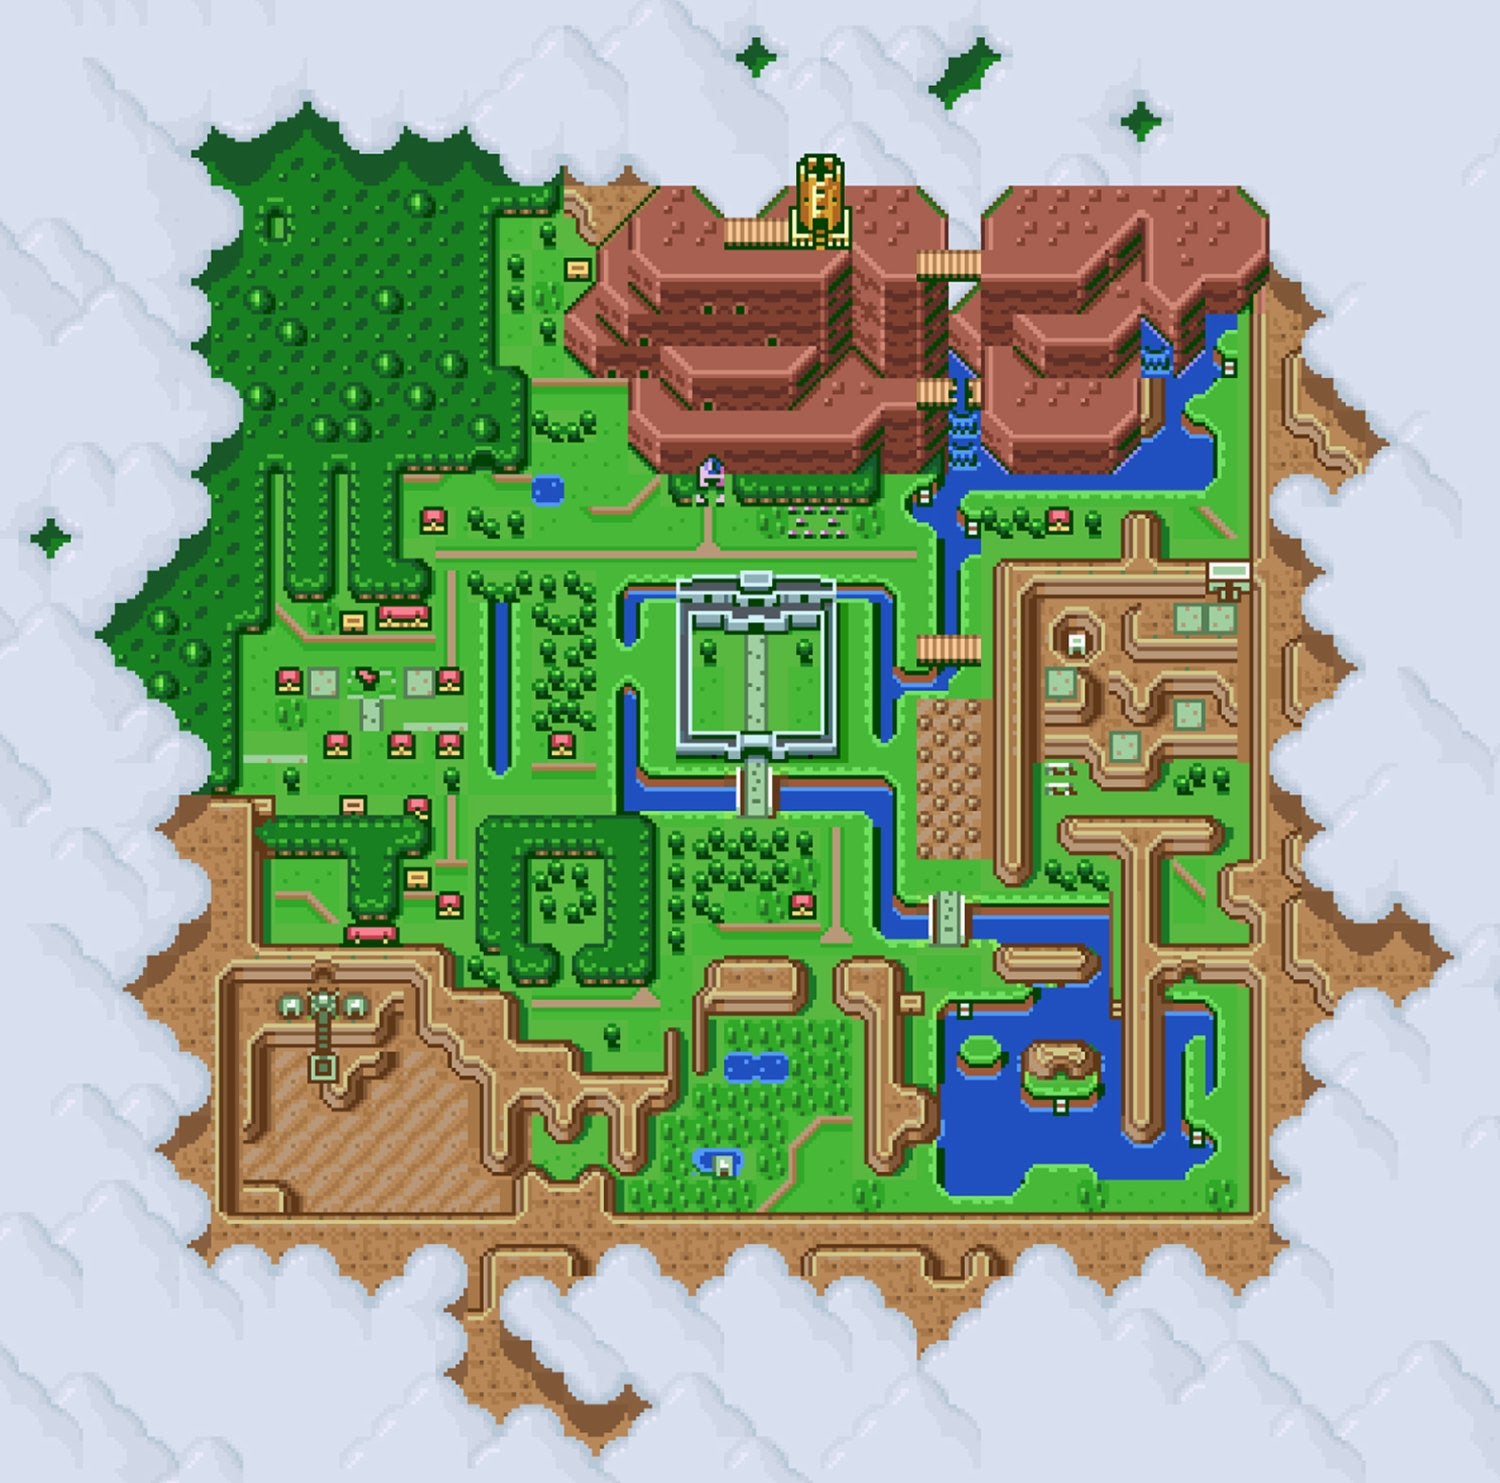
Legend of Zelda: A Link to the Past, Map of Hyrule - Canvas Wrap Print
The Legend of Zelda - A Link to the Past (SNES): saiba como encontrar todos os Hearts Pieces - Nintendo Blast

Hyrule Map: Detonando! The Legend of Zelda: A Link to the Past - Parte 13: Itens preciosos (opcional)

Detonado de Bolso – Legend of Zelda – A Link to the Past (SNES) – Parte 8 – Itens
The Legend of Zelda - A Link to the Past (SNES): saiba como encontrar todos os Hearts Pieces - Nintendo Blast

Ian Games: Detonado de Bolso: The Legend Of Zelda: A Link To The Past (1-11/16)
Hyrule Map: Detonando! The Legend of Zelda: A Link to the Past - Parte 18: O gélido Templo do Gelo
Recomendado para você
-
![The Legend of Zelda: A Link to the Past [Detonado 100%]](https://i.ytimg.com/vi/3Jm8_1zoZtw/hq720.jpg?sqp=-oaymwEXCK4FEIIDSFryq4qpAwkIARUAAIhCGAE=&rs=AOn4CLBCDXATrSWHtoSqh31fziAnmL8XSw) The Legend of Zelda: A Link to the Past [Detonado 100%]01 junho 2024
The Legend of Zelda: A Link to the Past [Detonado 100%]01 junho 2024 -
![Detonado Completo 100%] Zelda: A Link to the Past #7 - MASTER SWORD!](https://i.ytimg.com/vi/5jV_6R3LI4I/maxresdefault.jpg) Detonado Completo 100%] Zelda: A Link to the Past #7 - MASTER SWORD!01 junho 2024
Detonado Completo 100%] Zelda: A Link to the Past #7 - MASTER SWORD!01 junho 2024 -
DETONADO The Legend of Zelda: A Link to The Past (GBA) #01, ~ DETONADO The Legend of Zelda: A Link to The Past (GBA) #01 >>>>>>>> >>>>>>>> Escolhemos a01 junho 2024
-
Detonado Legend of Zelda A Link To The Past SNes PDF01 junho 2024
-
 Guia N-Blast: The Legend of Zelda - A Link Between Worlds by Nintendo Blast - Issuu01 junho 2024
 -
 The Legend of Zelda - A Link to the Past01 junho 2024
 -
 Guia N-Blast: The Legend of Zelda - A Link Between Worlds by Nintendo Blast - Issuu01 junho 2024
 -
 O Super Nintendo e o Inglês. Quase todo mundo tem memórias boas da…, by Paulo Andrade01 junho 2024
 -
RESOLVIDO] Help no Legend of Zelda: A Link to the Past Fórum Adrenaline - Um dos maiores e mais ativos fóruns do Brasil01 junho 2024
-
![Detonado Completo 100%] Zelda: A Link to the Past #8 - PALACE OF DARKNESS](https://i.ytimg.com/vi/Xz3bc_xkH8E/hq720.jpg?sqp=-oaymwEhCK4FEIIDSFryq4qpAxMIARUAAAAAGAElAADIQj0AgKJD&rs=AOn4CLDVXpmxn1e7-66UWzMYvL6ez-tEkw) Detonado Completo 100%] Zelda: A Link to the Past #8 - PALACE OF DARKNESS01 junho 2024
Detonado Completo 100%] Zelda: A Link to the Past #8 - PALACE OF DARKNESS01 junho 2024


você pode gostar
-
 Julia Michaels - Sorry To Me Too (TRADUÇÃO/LEGENDADO)01 junho 2024
 -
Roupa Infantil Fantasia Aniversário Roblox01 junho 2024
-
 When is Minecraft Java Mojang Account Migration Happening01 junho 2024
 -
 Taiga - Toradora by FeirisNyanNyan on DeviantArt01 junho 2024
 -
Open RBX Roblox Group - Rolimon's01 junho 2024
-
 CARA PASANG TOMAZ ARMOR GAMING TABLE01 junho 2024
 -
ALPHABET LORE A-Z but everyone is K😎 #K #ALPHABET #alphabetlore01 junho 2024
-
 Scarlett Johansson Officially Joins 'Ghost in the Shell' Remake01 junho 2024
 -
 Mandela Catalogue by GothicRift01 junho 2024
 -
 Onde assistir ao vivo e online o jogo do Corinthians hoje, domingo, 15; veja horário01 junho 2024