Using the Tilt-Shift Blur in Photoshop - Planet Photoshop
Por um escritor misterioso
Last updated 23 maio 2024
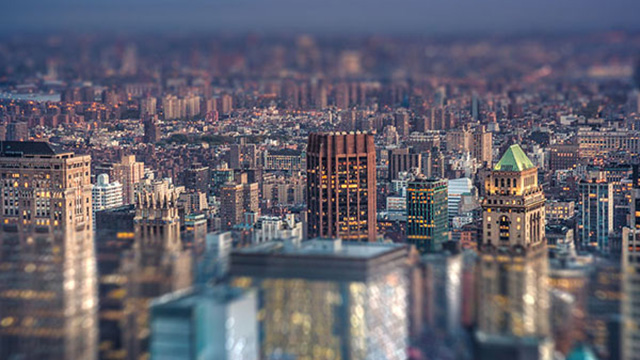
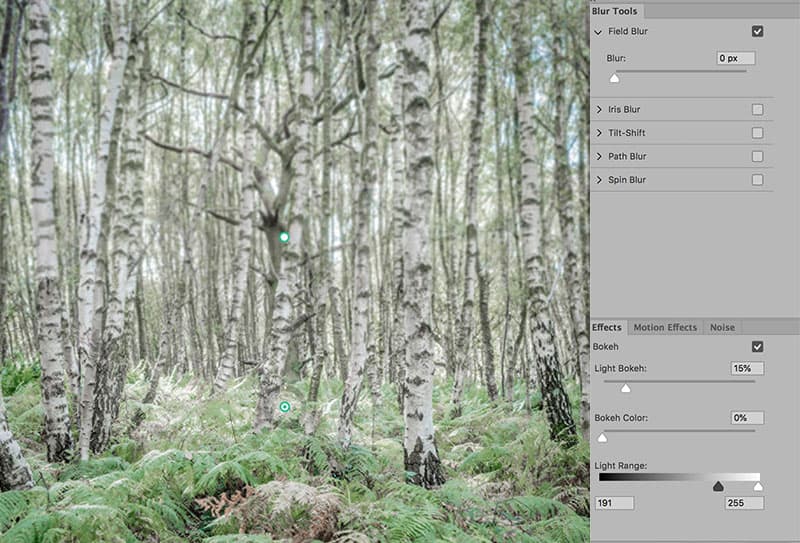
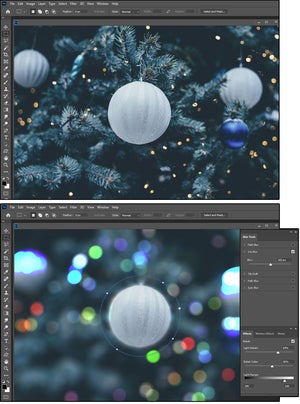
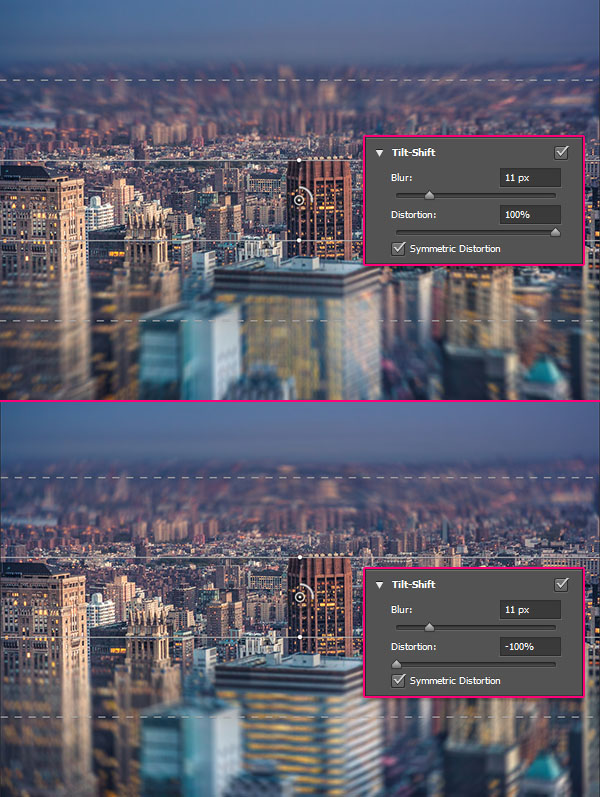
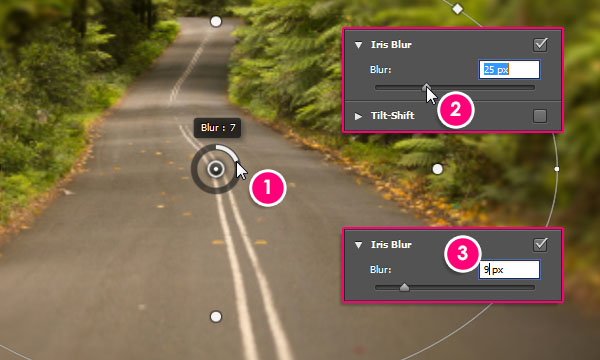
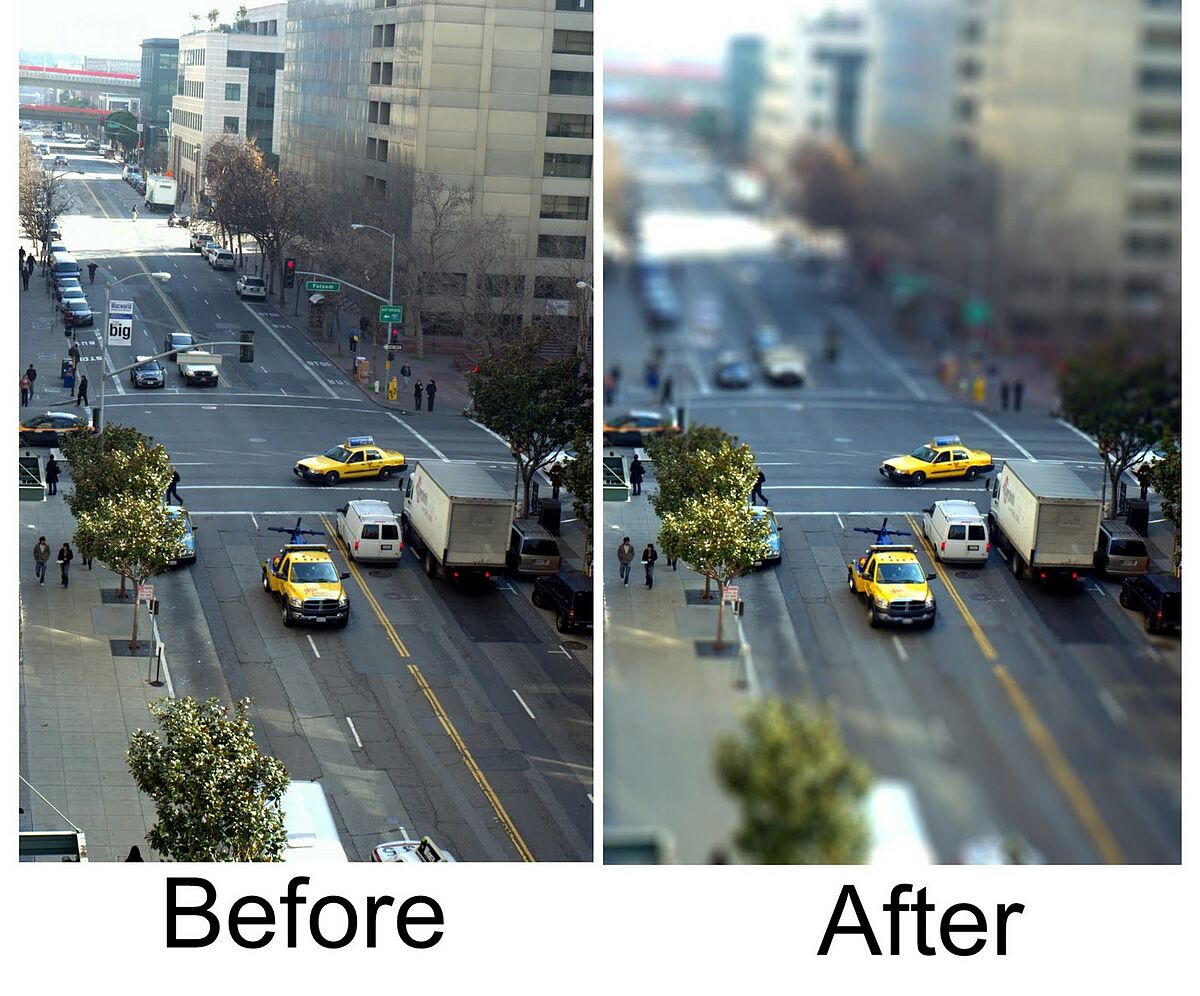
The Tilt-Shift Blur is the third of the five blur filters in the Blur Gallery available in Photoshop CC and later, but it was first introduced as one of three filters in Photoshop CS6. Tilt-shift photography is a way of giving subjects of a photo a miniature look. That's achieved by selectively focusing and defocusing parts of the image through manual tilting and shifting the camera lens, creating a shallow depth of field that's similar to macro photography. In this tutorial, you'll learn how to use the Tilt-Shift filter to achieve the miniature effect and add a bokeh effect. Tutorial Assets Toward Brooklyn by Peter Alfred Hess Choosing the Right Photo This effect works best with photos taken from above, looking downward with an angle on the subject that will be in focus. The photo should also be in focus and simple but interesting. The image below was chosen to showcase the effect and the bokeh. You may use any other image you like. Working With Pins and Modifying the Blur and Transition Areas STEP ONE: Open the Toward Brooklyn image, Right-click the Background layer, and choose Convert to Smart Object. Alternatively, you can select that layer and go to Filter>Convert for Smart Filters. Smart objects are great when using filters, as they make the applied filters editable at any time. STEP TWO: Go to Filter>Blur Gallery>Tilt-Shift. This will open the Blur Gallery and show the effect of the default filter values on the image. You'll see a pin in the center of the image with a couple of solid and dashed lines above and below it. STEP THREE: At the right of the screen, there are two panels: The main Blur Tools panel at the top with the Tilt-Shift filter's options and controls, and the Blur Effects panel at the bottom, with some extra options and settings for the bokeh effect. STEP FOUR: There are a couple more controls in the Options Bar that might come in handy, as well. High Quality controls the rendering quality of the preview. If this box is checked, the preview might be rendered a bit slower, depending on your device. When checked, Preview shows the result of any changes in the blur filter's settings. When unchecked, you can view the original image without any blur. Tip: You can press the P key to turn the Preview on and off. Click the Remove All Pins icon (curved arrow) in the Options Bar to remove all the blur pins on the image. STEP FIVE: There are three areas controlled by the lines. The protected area (1) is the area between the center pin and the solid lines. This area is not affected by the blur amount at all, so it stays sharp and in focus. The transition area (2) is the area between the solid and dashed lines. The blur grows progressively from the solid lines toward the dashed ones, where it reaches its full strength. The full blur area (3) gets a 100% blur effect, so all the image parts outside the dashed lines are 100% blurred. STEP SIX: To move the pin around, simply click on its center and drag it to a new position, then release the mouse button. To change the blur amount of a pin, select that pin by clicking its center, then you can either: • Move the mouse over the outer ring, then click-and-drag clockwise to increase the blur amount and counterclockwise to decrease it. • Drag the Blur slider in the Blur Tools panel to the right to increase the blur amount and to the left to decrease it. • Click inside the Blur field under the Blur Tools panel and enter an integer value between 0 and 500 px. STEP SEVEN: You can adjust the protected area by clicking-and-dragging the dots on the solid lines. Simply hover the cursor over the dot, and when the cursor's shape changes into a rotate icon, click the dot and drag it to adjust the blur area or rotate the blur. You can also click-and-drag the solid line itself to move it while maintaining its rotation angle, and you can click-and-drag the dashed line to adjust the size of the transition area. The further the dashed lines are from the solid ones, the smoother the transition. The Focus value in the Options Bar at the top controls the blur amount between the center pin and the solid lines. The Distortion and Bokeh Effects STEP ONE: The Distortion effect in the Blur Tools panel is similar to what the Radial Blur (Filter>Blur>Radial Blur) does. Dragging the slider to the right will add a zoom effect to the blurring, and dragging the slider to the left will add a spin effect. By default, the Distortion is applied to the bottom part of the image only, so to apply it to both parts, check the Symmetric Distortion option below the slider. Make sure to try different settings and values until you get a result you like. STEP TWO: One more effect you can add to the image with the Tilt-Shift filter is the bokeh effect. Bokeh is the effect created when the camera lens renders out-of-focus points of light. STEP THREE: Check the Bokeh box in the Blur Effects panel, and start changing the Light Bokeh value to create the bokeh effect. The Light Bokeh value controls the bokeh effect's overall intensity. Bokeh Color controls how colorful the bokeh is, similar to the Saturation in the Hue/Saturation dialog. Light Range controls the range of light where the bokeh appears. If you drag the black slider to the left, you're excluding the darker areas. If you drag the white slider to the right, you're excluding the lighter areas of the image. Play around with the different values until you get a result you like. This tutorial covered the basics of the Tilt-Shift filter, and explained a couple of different ways of using it to get some interesting results. I hope you enjoyed the […]
Tilt Shift Blur Effect in Photoshop @WizardofGraphics

Solved: Tilt-shift blur not working - Adobe Community - 11729594

How to Create a Tilt-shift Blur in Photoshop CS6
How to add lens-blurring effects using Photoshop - Amateur Photographer
How to use Photoshop Blur Gallery for Bokeh effects and more
Using the Tilt-Shift Blur in Photoshop - Planet Photoshop

How to Blur the Background in Photoshop: Step-By-Step Guide
Using Iris Blur in Photoshop - Planet Photoshop

The Blur Gallery: Tilt-Shift Blur, Iris, & Field Blur – Photoshop CS6 Tutorial – Photoshop and Illustrator Tutorials
Recomendado para você
-
 Tilt Shift - Giantess Wiki23 maio 2024
 -
 An Introduction to Tilt-Shift Photography23 maio 2024
 -
 Tilt-Shift Lenses – Fun but also Practical23 maio 2024
 -
 How to Easily Simulate a Tilt-Shift Effect Using Photoshop23 maio 2024
 -
 Tilt Shift Photos : r/midjourney23 maio 2024
 -
 How To Do A Tilt-Shift Timelapse With A Regular Lens - Emeric's Timelapse23 maio 2024
 -
 How to Use a Tilt Shift Lens in 2023 (+ 7 Best Lenses)23 maio 2024
 -
 Make ANYTHING tiny! // After Effects Tilt-Shift Tutorial23 maio 2024
 -
 Getting Started in Tilt Shift Photography: 25 Tips Tilt shift photography, Tilt shift, Tilt shift photos23 maio 2024
 -
 What You Didn't Know About the Shift Function on Tilt-Shift Lenses23 maio 2024
você pode gostar
-
 APPRECIATION: A few of my favorite wallpapers of Henry Cavill23 maio 2024
 -
Mortal Kombat 4 (video game, Arcade, 1997) reviews & ratings - Glitchwave video games database23 maio 2024
-
 Presenting Dynamo opponent: HNK Rijeka (Croatia) - FC Dynamo Kyiv23 maio 2024
 -
 Jogo Watch Dogs - PS3 - MeuGameUsado23 maio 2024
 -
 Violência contra a mulher no ciberespaço: pornografia de vingança, by Tribunal Regional do Trabalho da 2ª Região23 maio 2024
 -
 Flappy Bird23 maio 2024
 -
![Grand piece online [GPO] - Goro goro no mi](https://cdn-offer-photos.zeusx.com/f44274d5-b4c2-405c-9172-965cde06737a.jpg) Grand piece online [GPO] - Goro goro no mi23 maio 2024
Grand piece online [GPO] - Goro goro no mi23 maio 2024 -
benditobrigadeiro027 - Bolo de 2 andares ?? temos sim senhor rs O23 maio 2024
-
Killer sans by Pop_pop on Sketchers United23 maio 2024
-
 Roblox €50 Gamecard23 maio 2024

